Pages

Showing posts with label Autumn. Show all posts

Monday, 24 October 2016

Signs of Autumn


This Tut was written by me on the 24th October 2016

Supplies Needed

Font - Awasawez

Mask 168 by BBD

Tube by Alex Prihodko

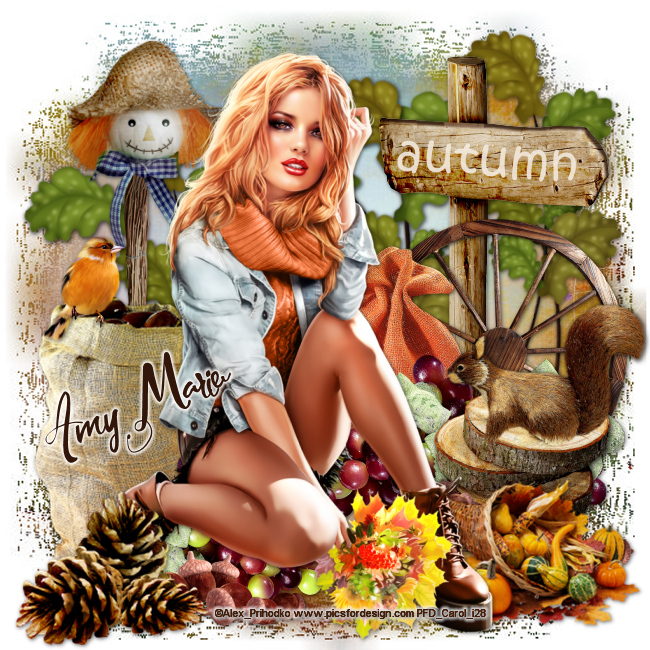
Scrap Kit - Autumn Daze by Amy Marie

Word Art of your choice.

Drop shadow 1,1,60,6

After resizing > adjust sharpness > sharpen.

Open blank image 650 x 650

New raster layer, select all, paste paper 6 into selection, select none.

Apply mask, merge group, duplicate.

Add element 72, resize 80%, duplicate x 2, add drop shadow.

Add element 38,  resize 80%, add drop shadow.

Add element 44, add drop shadow.

Add element 105, resize 80%, add drop shadow.

Add element 102,  add drop shadow .

Add element 108, resize 60%, add drop shadow.

Add element 79, resize 40%, image mirror, add drop shadow.

Add tube, resize , add drop shadow.

Add element 91, resize 30%, image mirror, add drop shadow.

Add element 97, resize 40%, add drop shadow.

Resize, add name and copyright.


Sunday, 5 October 2014

Autumn Time


This Tut was written by me on the 5th October 2014

Supplies Needed

Font used - Bedford Text

Mask 16 by Gem

Scrapkit-  Golden Days of Autumn by Gold Dust

Tube by Alex Prihodko

Available at Pics for Design

Drop shadow 1,1,50,8

After resizing > adjust sharpness > sharpen.

Open blank image 650 x 650

New raster layer, select all, paste paper 9 into selection, select none.

Apply mask, merge group, duplicate, merge down, image mirror.

Add tree 5, resize 60%, add drop shadow.

Add scarecrow 2, resize 60% , add drop shadow.

Add barrel, resize 50%, add drop shadow.

Add hay,  resize 70%, , add drop shadow.

Add leaf cluster, resize 55%, add drop shadow.

Add deco, resize 50%, image mirror, add drop shadow.

Add tube, resize, add drop shadow.

Add cookie jar,  resize 40%, add drop shadow.

Add lamp, resize 65%, add drop shadow.

Add acorns 1 , resize 40%, add drop shadow.

Add name and copyright

Tuesday, 30 September 2014

Autumn Days


This Tut was written by me on the 30th September 2014

Supplies Needed

Font used - Yaquote Script

Mask 197 by Gem

Scrapkit-  Autumn  by Mago 74

Tube by Alex Prihodko

Available at Pics for Design

Drop shadow 5,5,60,5

After resizing > adjust sharpness > sharpen.

Open blank image 650 x 650

New raster layer, select all, paste paper 7 into selection, select none.

Apply mask, merge group, duplicate, merge down.

Add element 33, resize 15%, add drop shadow.

Add element 14, resize 25% image mirror, image flip, add drop shadow.

Add element 34, resize 15%, add drop shadow.

Add element 1,  resize 15%, image flip, rotate right, add drop shadow.

Add element 42, resize 30%, erase part of the stem, add drop shadow.

Add frame 3, resize 23%, add drop shadow.

Using magic wand, click inside the frame, select modify expand by 4.

New raster layer, paste element 73 into selection, arrange move down.

Keep selected, paste tube as a new layer, duplicate, select invert.

Select first tube layer , delete, select none, arrange move down.

Using the eraser, carefully erase the bottom part of the tube that overhangs the frame.

Add element 61,  resize 18%, add drop shadow, arrange , move down.

Add word art 2, resize 20%, add small gradient glow.

Add name and copyright


Wednesday, 30 October 2013

Colours of Fall


This Tut was written by me on the 30th October 2013

Supplies Needed

Font of choice

Masks of Choice


Scrapkit- Fall Leaf by Design by Joan

You can find it - Here

Tube by Danny Lee

You can find it Here

Drop shadow 1,1,50,5

After resizing > adjust sharpness > sharpen.

Open blank image 700 x 700.

Flood fill with white, apply mask merge group.

New raster layer, select all, paste paper 2 into selection, select none.

Apply mask, merge group.

Add element 57,  resize 80%, add drop shadow.

Add element 24, resize 80%, add drop shadow.

Add element 52, resize 75%,   add drop shadow.

Using magic wand, select inside frame, modify, expand by 5, paste paper 9 as a new layer, select, invert delete.

Arrange, move down.

Keep selected , add tube, duplicate, select original, delete, select none.

Move copy of tube to the top, delete, any overhanging the bottom of the frame.

Add element 85, resize 60%, add drop shadow .

Add element 17, resize 70%, add drop shadow.

Add element 77,  resize 80%, add drop shadow.

Add element 61, resize 60% ,  add drop shadow.

Add element 84, resize 60%, add drop shadow.

Add element 64, resize 60%,   add drop shadow.

Add element 60, resize 60%, add drop shadow.

Add element 63, resize 60%, add drop shadow.

Resize, add name and copyright.

Thursday, 24 October 2013

Autumn Song


This Tut was written by me on the 24th October 2013

Supplies Needed

Font of choice

Mask of choice

20-20 mask

Scrapkit- Autumn Music by Bibi's Collection 

You can find it - Here

Tube by Verymany

You can find it Here

Drop shadow 1,1,60,6

After resizing > adjust sharpness > sharpen.

Open blank image 700 x 700.

Select all, paste paper 2 into selection, select none.

New raster layer, select all, paper 1 into selection, select none.

Apply mask, merge group.

Add element 26,  add drop shadow.

Add close up of tube, apply 20-20 mask, merge group.

Add element 42, resize 80%, add drop shadow.

Add element 58, resize 60%,  add drop shadow.

Add tube, resize, add drop shadow.

Add element 14, resize 50%, add drop shadow .

Add element 29, resize 60%,  add drop shadow.

Add element 34,  resize 60%, image mirror, add drop shadow.

Add element 37.

Add element 21, resize 70% , add drop shadow.

Add element 57, resize 50%, add drop shadow.

Add element 15, resize 50%, image mirror, add drop shadow.


New raster layer, select all, paste paper 10 into selection, select none.

Select all, modify, contract by 5, delete, selection invert, add  drop shadow, select none.

Resize, add name and copyright.

Wednesday, 23 October 2013

Be Thankful


This Tut was written by me on the 23rd October 2013

Supplies Needed

Font of choice

Falling Leaves animation by Simone

Scrapkit- Thanksgiving Night by Bibi's Collection

You can find it - Here

Tube by Diana Gali

You can find it Here

Drop shadow 1,1,60,6

After resizing > adjust sharpness > sharpen.

Open blank image 700 x 700.

Select all, paste paper 10 into selection, select none.

Add element 40,  add drop shadow.

Add element 38, resize 60%, add drop shadow.

Add element 42, resize 70%, duplicate, image mirror, add drop shadow.

Add element 24, resize 30%, add drop shadow .

Add element 47, resize 60%,  add drop shadow.

Add element 82,  resize 40%, add drop shadow.

Add element 129,  resize 35%, add drop shadow.

Add tube, resize, add drop shadow.

Add element 14, resize 40% , add drop shadow.

Add element 15, resize 40%, add drop shadow.

Add element 119, resize 60%, colourise to suit,  add gradient glow.

Add element 13, resize 60%, add drop shadow.

Add element 54, resize 40%, add drop shadow.

Add element 33, resize 40%, add drop shadow.

Add element 22, resize 25%, rotate left, add drop shadow.

Add element 18, resize 35%, add drop shadow.

Add element 49, resize 70%, add drop shadow.

Add element 78, resize 25%, image mirror, add drop shadow.

Add element 113, resize 40%, add drop shadow.

New raster layer, flood fill with colour of choice, select all, modify, contract by 3, delete, select none.

Resize, add name and copyright.

Animation

Copy background layer, paste as a new animation.

 Duplicate until you have 15 frames.

Open animation, resize to width of your tag.

Select all, click on 1st frame of animation, and drag onto the 1st frame of the tag.

Back to psp, close background layer, copy merged, paste as a new animation.

Select animation, select all, propogate paste.

Select tag, select, copy, click on animation, edit, paste in selected frame, when happy with the position, release.

Animation frame properties - 18
Save as gif.

Sunday, 20 October 2013

Rhapsody


This Tut was written by me on the 20th October 2013

Supplies Needed

Font of choice

Mask of choice

Scrapkit- Bohemian Rhapsody

You can find it - Here

Tube by Alex Prihodko

You can find it Here

Drop shadow 1,1,60,6

After resizing > adjust sharpness > sharpen.

Open blank image 700 x 700.

 Select all, paste paper 7 into selection, select none.

Apply mask, merge group.

Add element 42, resize 80%.

Add element 24, resize 60%, add drop shadow.

Add element 8, resize 40%, add drop shadow.

Add element 31, resize 40%,  add drop shadow.

Add element 38, resize 40%, image mirror, add drop shadow.

Add element 36, resize 40%,  add drop shadow.

Add tube, resize, add drop shadow.

Add element 35, resize 25%, rotate left, duplicate, resize 80%, image mirror, add drop shadow.

Resize, add name and copyright.

Monday, 14 October 2013

Autumn Girl


This Tut was written by me on the 14th October 2013

Supplies Needed

Font of choice


Falling Leaves animation by Simone

Scrapkit- Autumn Girl by Disturbed Scraps

You can find it - Here

Tube by Diana Gali

You can find it Here

Drop shadow 1,1,60,6

After resizing > adjust sharpness > sharpen.

Open blank image 700 x 700.

New raster layer, select all, paste paper 1 into selection, select none.

Add element 22,  add drop shadow.

Add element 73, add drop shadow.

Add element 9, resize 50%, add drop shadow .

Add element 4, resize 50%, add drop shadow.

Add element 20, resize 50%, image mirror, add drop shadow.

Add element 41,  resize 50%, add drop shadow.

Add element 36,  duplicate, add drop shadow.

Add element 40, resize 30% , add drop shadow.

Add element 18, resize 40%, add drop shadow.

Add element 5, resize 40%, add drop shadow.

Add element 2, resize 20%, add drop shadow.

Add element  14, resize 40%, add drop shadow.

Add element 26, resize 40%, add drop shadow.

Add element 35, resize 40%, add drop shadow.

Add element 43, resize 40%, add drop shadow.

Add element 44, resize 40%, add drop shadow.

Add tube, resize, add drop shadow.

Add element 32, resize 40%, add drop shadow.

Add word art, colourise to suit.

Resize, add name and copyright.

Animation

Copy merged, duplicate until you have 15 frames.

Open animation, resize 50%.

Select all, click on 1st frame of animation, and drag onto the 1st frame of the tag.

Save as gif.

Thursday, 3 October 2013

Foxy Fall


This Tut was written by me on the 3rd October 2013

Supplies Needed

Font of choice

Scrapkit- Fox by Bibi's Collection, animation included in kit

You can find it - Here

Tube by Celineart Pinup

You can find it Here

Drop shadow 1,1,60,6

After resizing > adjust sharpness > sharpen.

Open blank image 700 x 700.

Select all, paste paper 4 into selection, select none.

Add element 45, resize 80%, add drop shadow .

Add element 40, resize 50%, add drop shadow.

Add element 67,  add  drop shadow.

Add element 50,  resize 60%, duplicate, image mirror, add drop shadow.

Add element 57, resize 30%, add drop shadow .

Add element 49, resize 40%, image mirror, add drop shadow.

Add element 62,  resize 30%, duplicate, image mirror, add drop shadow.

Add tube, resize, add drop shadow.

Add element 41,  add drop shadow.

Add element 61, resize 60% , image mirror, add drop shadow.

Add element 52, resize 50%, image mirror, add drop shadow.

Add element 10, resize 60%, add drop shadow.

Add element 56, resize 60%, image mirror, add drop shadow.

New raster layer, flood fill with colour of choice, select all, modify, contract by 5, delete, select, invert, effects, 3d effects inner bevel.


Add  drop shadow.

Resize, add name and copyright.

Animation


Select raster 1, copy , paste as new animation.

Duplicate until you have 15 frames.

Edit, select all.

Open animation, resize 70%, edit, select all, edit, copy, drag 1st frame of animation onto 1st frame of tag, release.

On 1st animation, select all, propogate paste.

Go back to psp, close off layer 1, copy merged, paste as a new animation, edit, copy.

Select 1st animation, edit, paste into selected frame, position, release.

Save as gif.


Friday, 27 September 2013

Divine Autumn


This Tut was written by me on the 27th September 2013

Supplies Needed

Font of choice

Mask 72 by Vaybs

Scrapkit- Divine Autumn by SkyScraps

You can find it - Here

Tube by Jennifer Janesko

You can find it Here

Drop shadow 1,1,60,6

After resizing > adjust sharpness > sharpen.

Open blank image 700 x 700.

New layer, select all, paste paper 2 into selection, select none.

Apply   mask , merge group.

Add element 63, resize 40%, rotate right, add drop shadow.

Add element 80, resize 60%,  add drop shadow.

Add element 62, resize 40%, add drop shadow.

Add element 59, resize 80%, rotate right, add drop shadow.

Add element 78, resize 80%, add drop shadow.

Add element 67, resize 40%, add drop shadow.

Using magic wand , click inside frame, select, modify expand by 5, paste paper 6 into selection.

Arrange, move down.

Keep selected, paste tube as a new layer, duplicate, select original tube layer, delete.

Move copy of tube to the top, erase any of the tube overlapping the bottom of the fame.

Add element 35, resize 80%, rotate left, move under tube layer,  add drop shadow .

Add element  58, resize 30%, duplicate, image mirror, add drop shadow.

Add element 30,  resize 60%,  rotate left, add drop shadow.

Add element 5, resize 30%,  add drop shadow.

Resize, add name and copyright.

Friday, 20 September 2013

Fabulous Fall


This Tut was written by me on the 20th September 2013

Supplies Needed

Font of choice

Mask of choice

Scrapkit- Fabulous Fall by Design by Joan

You can find it - Here

Tube by Alex Prihodko

You can find it Here

Drop shadow 1,1,60,6

After resizing > adjust sharpness > sharpen.

Open blank image 700 x 700.

New layer, select all, paste paper 2 into selection , select none.

Apply  mask , merge group.

Add element 60,  add drop shadow.

Add element 74.

Add element 26, add drop shadow.

Add element 43,  add drop shadow .

Add element  4,  image mirror,  add drop shadow.

Add element 52,  add drop shadow.

Add element 12, resize 60%,  add drop shadow.

Add element 70,  add drop shadow.

Add element 50, resize 70%, add drop shadow.

Add tube, resize, add drop shadow.

Add element 25, resize 70%,add drop shadow.

Add element 58, resize 40%, add drop shadow.

Add element 36, resize 50%, add drop shadow.

Add element 69, resize 60%,  add drop shadow.

Add element 71, resize 70%, duplicate, merge down, add drop shadow.

Resize, add name and copyright, save.

Thursday, 22 August 2013

Autumn Serenade


This Tut was written by me on the 22nd August 2013

Supplies Needed

Font of choice

Mask of choice

Scrapkit- Violin by Bibi's Collection

You can find it Here

Tube by The Hunter

You can find it Here

Drop shadow 1,1,60,6

After resizing > adjust sharpness > sharpen.

Open blank image 700 x 700.

Select all, copy and paste paper 12 into selection, select none.

Apply mask, merge group.

Add element 38, resize 70%,  image mirror.

Add element 48, duplicate, image mirror, add drop shadow.

Add element 31, resize 60%, duplicate, image mirror, add drop shadow.

Add element 34, resize 70%,  add drop shadow.

Add element 28, resize 60%,  add drop shadow.

Add element 62,  resize 50%, add drop shadow.

Add element 6, resize 70%, add drop shadow.

Add element 75, resize 70% .

Add element 59,  add drop shadow.

Add element 64, add drop shadow.

Add element 79, resize 50%, duplicate x 4, add drop shadow.

Add element 2, resize 80%, add drop shadow.

Add tube, resize, add drop shadow.

Add element 71, resize 50%, add drop shadow.

Add element 69, resize 30%, add drop shadow.

Add element 70, resize 70%, add drop shadow.

Resize to your liking, add copyright and name.